Sub-Chain Installer
This has been created for Pirisubchains node installation on server(s).
Last updated
This has been created for Pirisubchains node installation on server(s).
Last updated
Installation & Server Requirements
Ubuntu
20.04.6
Node.js
Major: 20
npm
depend on node.js
MongoDB
5.0
Redis
6.0.8
Pirichain Technology opens a new door to the blockchain world with the Pirisubchain system, which allows you to create your own independent sub-chains and blockchain network.
Pirisubchains offer a service where you can design, operate, and serve all your dApp, web3.0, and BaaS infrastructure, thanks to a system that goes beyond data-centric blockchain approaches and does not require any blockchain oracles.
Pirisubchains, provided by Pirichain Technology, also offer a free interface to enable you to create your own blockchain network.
To use the Pirisubchains system, you need to register for free with the Pirisubchains license server. In the future, additional services will be included in the system where membership is used via email address.
A.1. Register:
The minimum password requirements are as follows:
At least 8 characters
At least one digit [0-9]
At least one lowercase letter [a-z]
At least one uppercase letter [A-Z]
At least one special character
After meeting these requirements, click the Register button to send the registration email to the email address you provided.
When you click on the Activate My Account link or navigate to the activation address via the plain link provided at the bottom, you will be directed to a page where you need to activate your account.
When you click the Verify My Account button, your account will be activated. If you encounter an error, the code you used for activation may have expired, or you might not have a valid code for the address you are trying to activate.
A.2. Login:
After your account is activated, you will be redirected to the Login screen. Use your registered email address and password to log in.
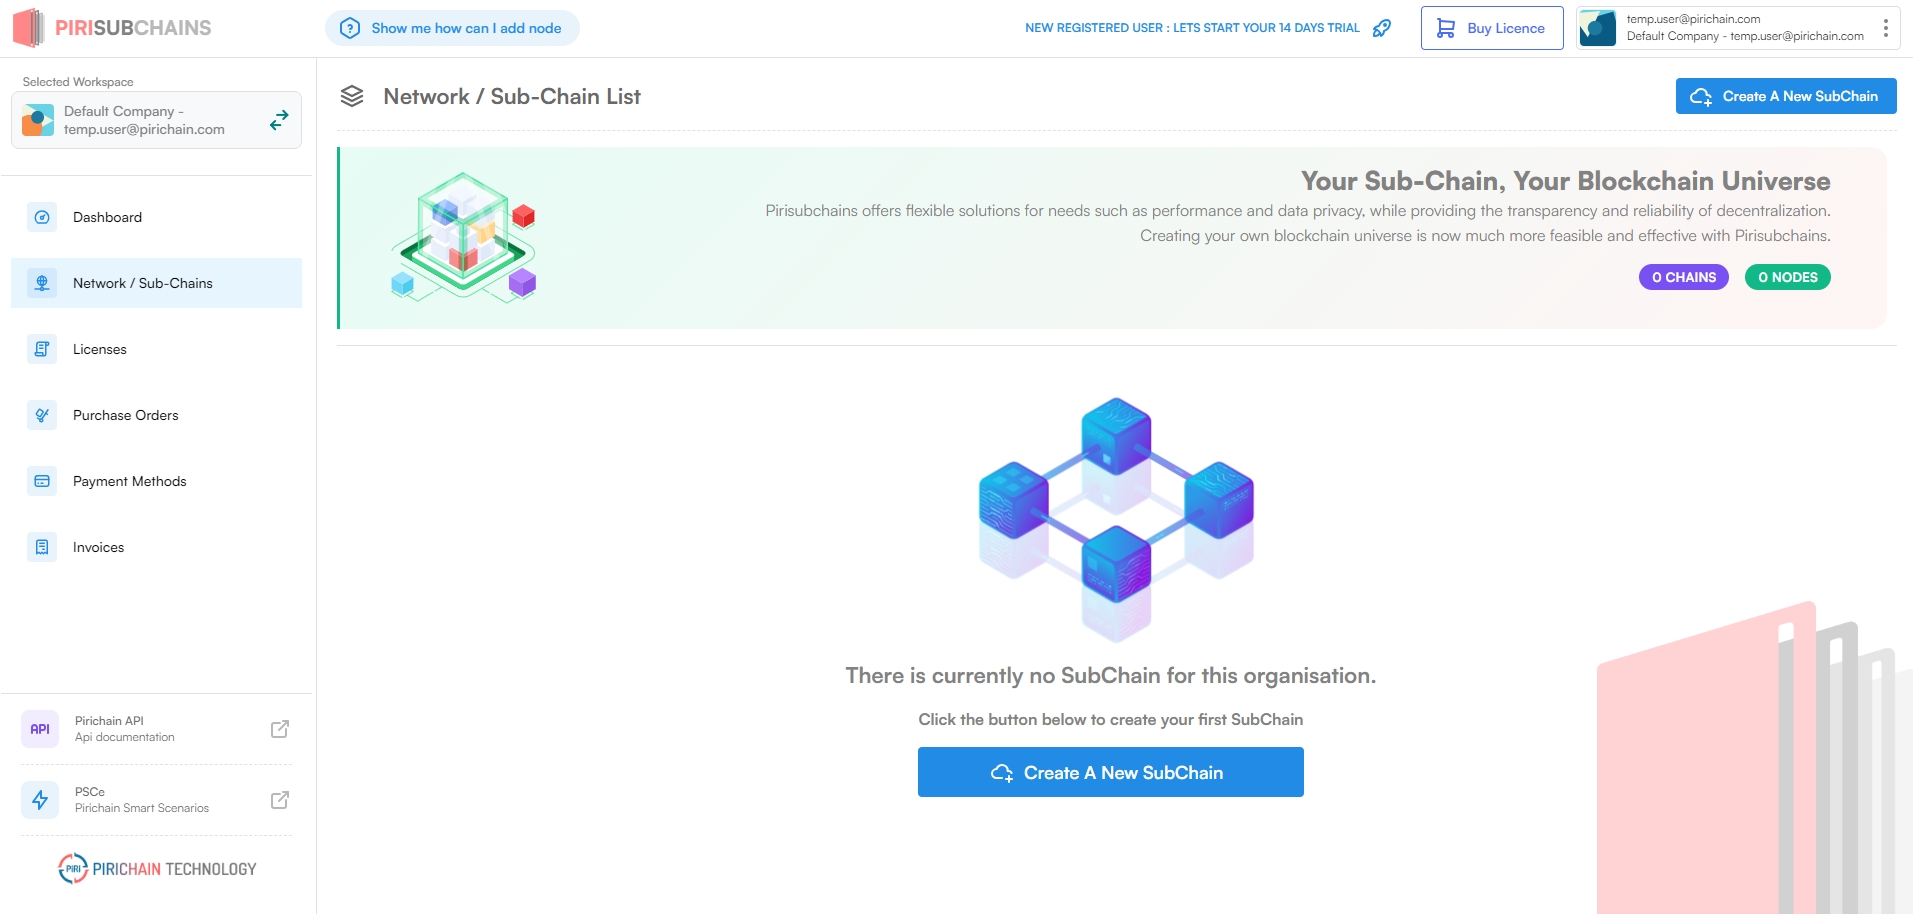
After logging in, click on Network / Sub-Chains from the menu on the right side of the screen. On the page that opens, click the * Create A New SubChain* button.
The step to create the Genesis Address, which will be used for a subchain, is done at this stage. Since the Genesis Address is created on the client side (browser side), the license server cannot store this address information. Therefore, it is essential for users to copy and save this information. In the modal pop-up that appears, click the copy icon in the top right corner of the section where the Genesis address is generated and store this information in a secure location accessible only to you.
Although it is possible to change the Genesis address on a network basis, this process involves re-executing many configurations and is a longer procedure. Therefore, it is crucial to store the Genesis address with stringent security measures. If the Genesis address falls into the wrong hands, the network administrator must stop all nodes and implement a security protocol across all nodes to ensure the network's security. [Detailed explanations will be published.]
It is recommended to store your Genesis address using a second layer of security (such as encryption, password protection, etc.) instead of keeping it in plain sight. Encrypting the address or protecting it with a password adds an extra layer of security, ensuring that even if it falls into the wrong hands, it cannot be read in plain text, thus increasing your security measures.
A.3. Sub-Chain and Adding Node
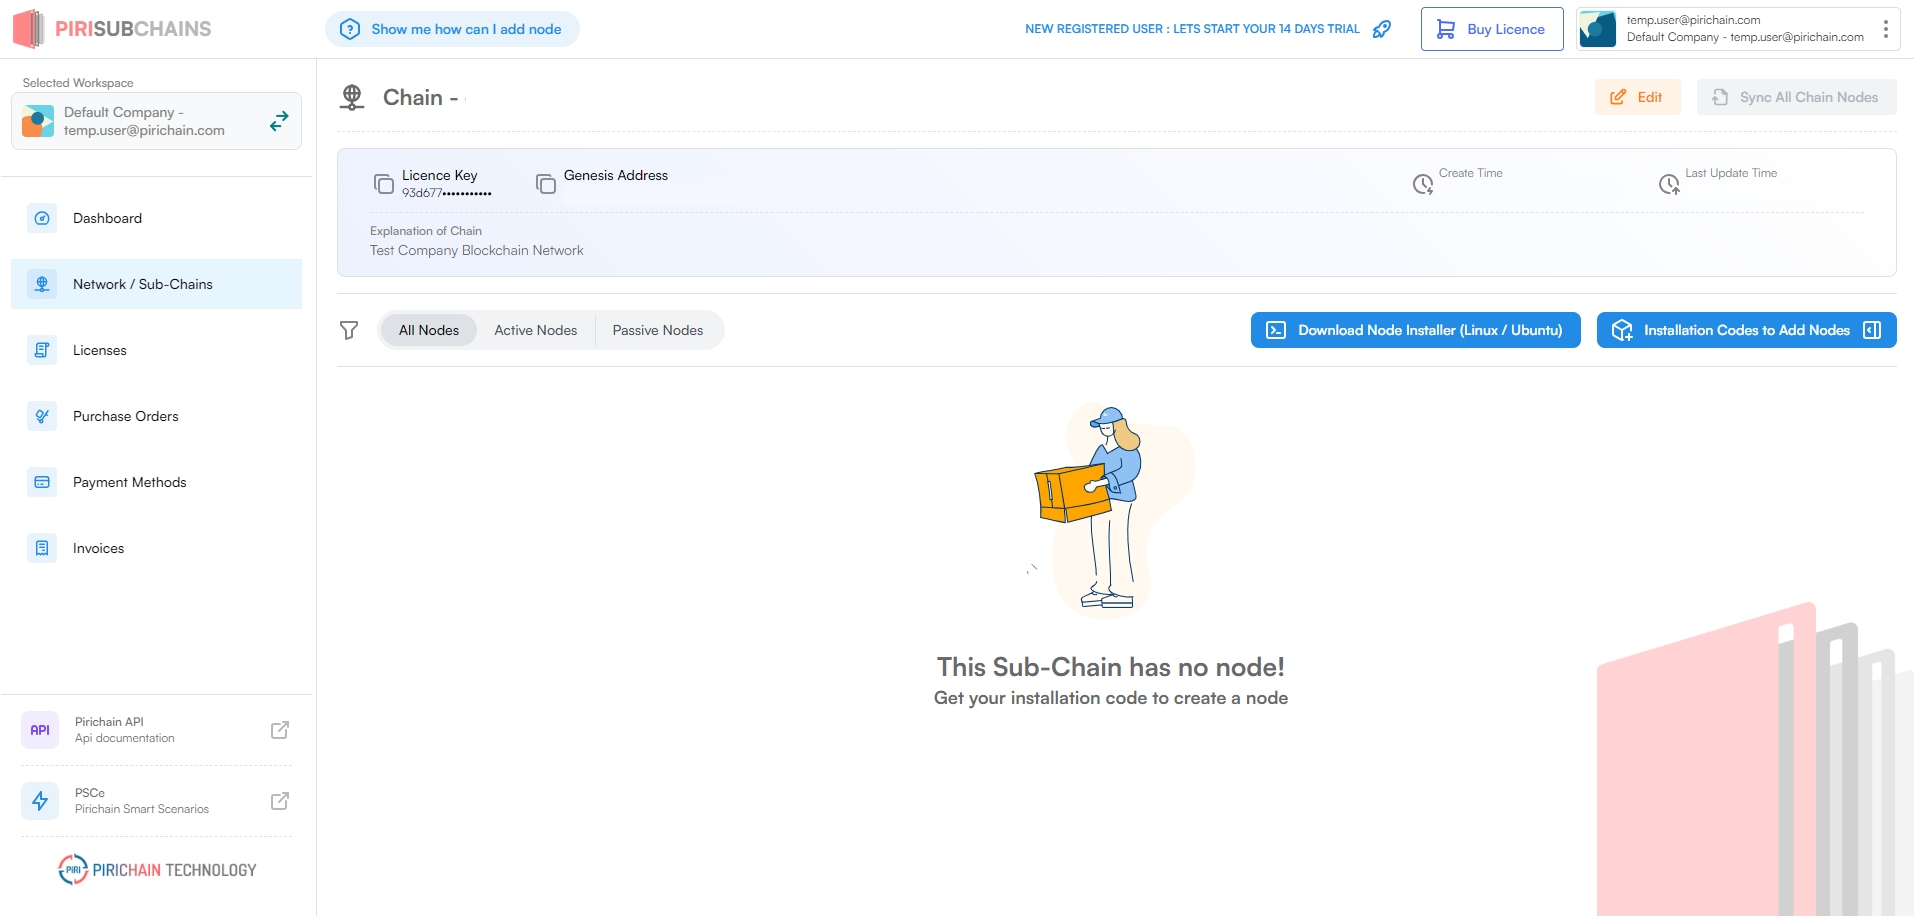
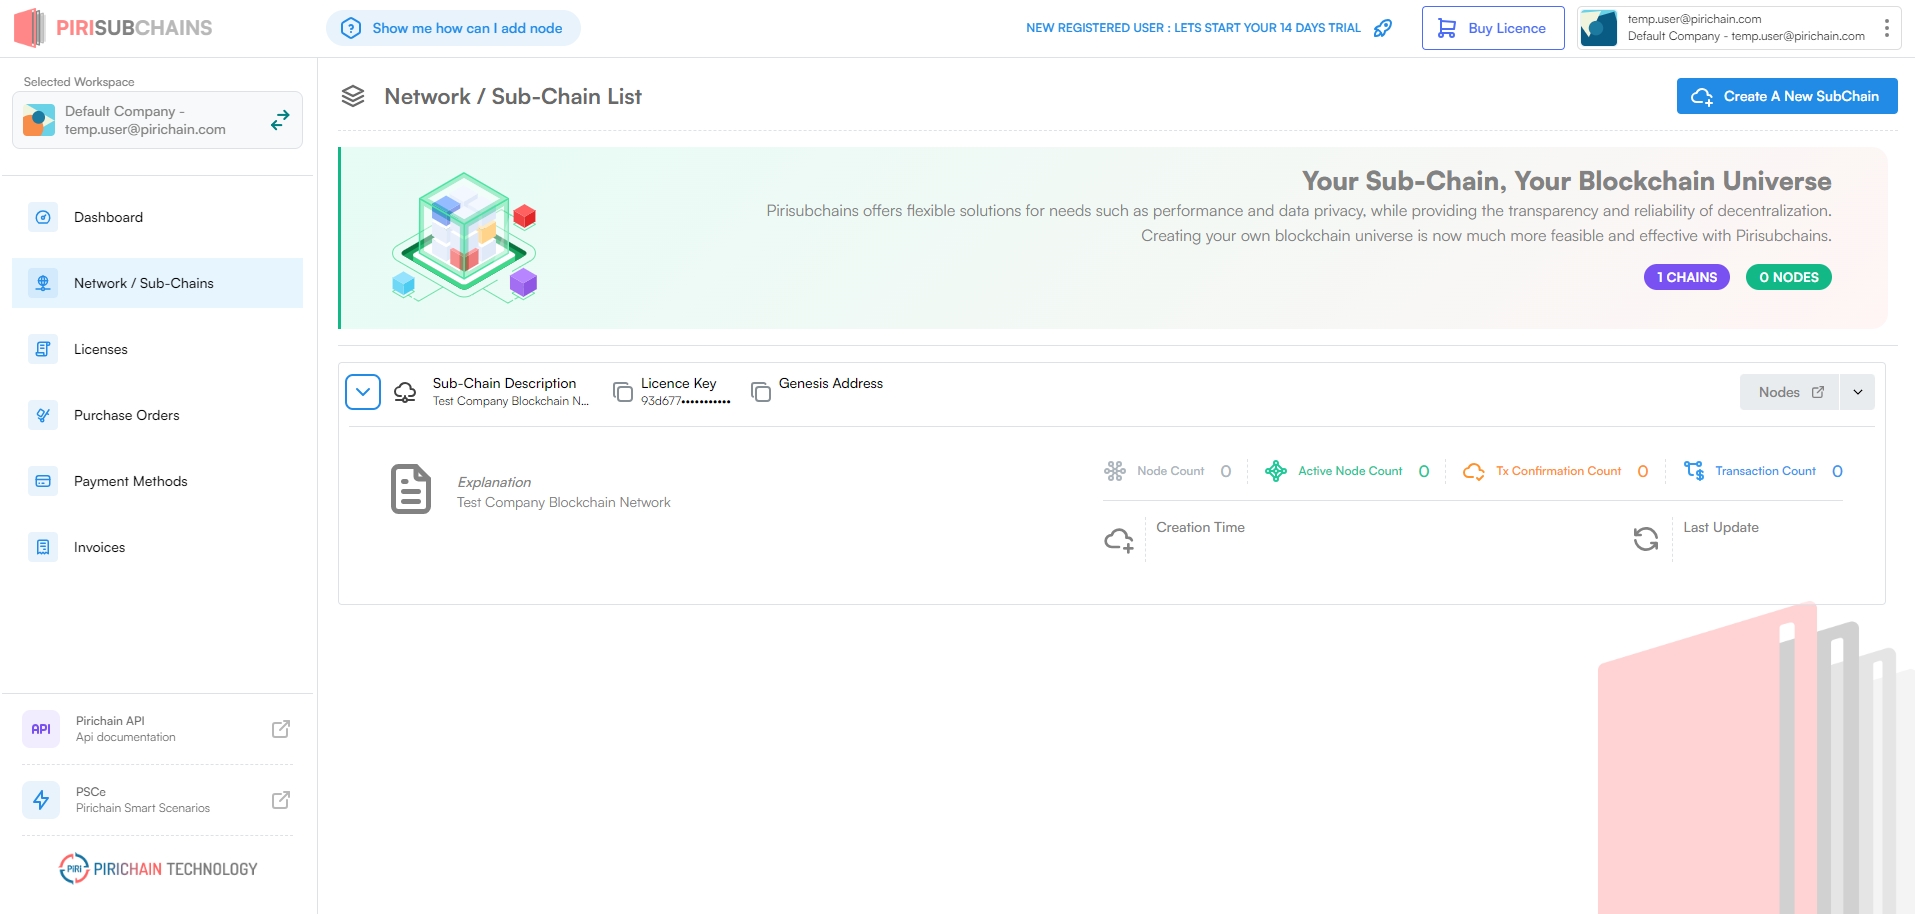
After creating your subchain, you will see a new row added to the list representing your subchain. This step was the first step in creating your network. As you add new nodes, you will see relevant information in the summary section of this subchain row. Now, click on the **Nodes ** button in your subchain row to proceed to the detail page of the subchain.
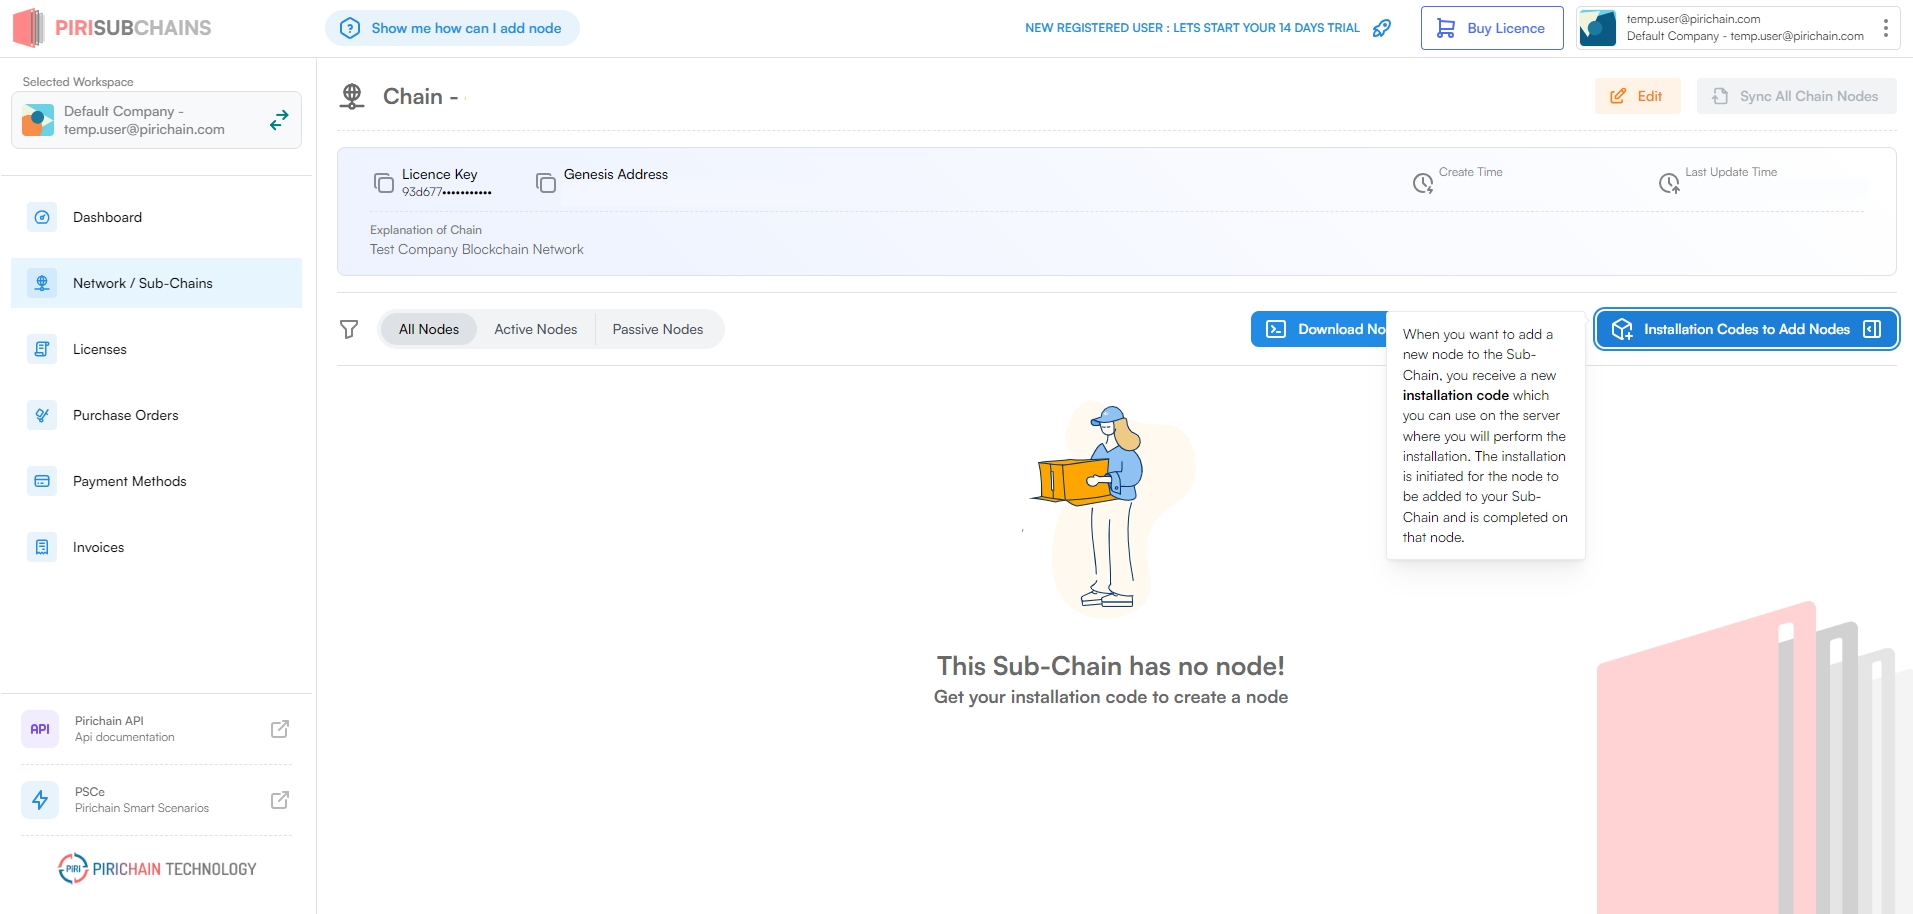
Since you do not have any nodes for your subchain yet, your screen will look like the following. Click on the Download Node Installer ( Linux / Ubuntu) button in the top right corner of this section (to the right of the filter row) to view the necessary code to obtain the node installer.
The codes here are formatted to work on Linux / Ubuntu servers. Ubuntu is currently the supported operating system for using a Node Installer and performing node installation. In the near future, support for a much wider range of operating systems will be available.
These codes are prepared to download and start a service and installation interface that you will use to install one of the Pirisubchain Nodes on your server. If we examine the details:
if [ -d "~/piri.subchains.installer" ]; then \ It checks for the existence of the installation folder on your server where you will perform the installation.
sudo rm -rf ~/piri.subchains.installer; If the installation folder exists, it deletes it. This is done to ensure that the information inside the installation folder is not used in new installations and to prevent conflicts.
git clone https://github.com/pirichain/piri.subchains.installer.git ~/piri.subchains.installer && \ It downloads the installation files from Pirichain Technology's public GitHub repository to your server.
chmod +x ~/piri.subchains.installer/run.sh && \ It grants execution permissions to the installation files using chmod for them to run properly.
~/piri.subchains.installer/run.sh It executes the run.sh script file located inside the downloaded piri.subchains.installer folder. The content of this file is as follows:
This installation script performs the following tasks:
Installs the pirisubchain.client service During installation, this service is used to send hardware and operating system information from the server being installed to the license server. The service collects and sends the following information to the license server: CPU, RAM, IP, MAC, OS Type, Arch. Type. All of this information is necessary to identify this node, ensure its correct and secure presence on the network, and is sent to the license server using one-way encryption (irreversible). This service is a fully compiled executable file.
Until IPv6 support is available, the line
sysctl -w net.ipv6.conf.all.disable_ipv6=1has been added to enable the possibility of using IPv6 services by default.
Checking node.js and npm Node and npm should be executable on the server where the installation will take place. The installation script checks and obtains them by running the following section:
First, the script changes to the directory where the installation will take place, which is taken as a parameter. If no parameter is given, the current directory is used. Then, it checks for the presence of npm and installs the 20 major version of node.js. After that, it installs pm2 and cross-env libraries, which are necessary npm libraries for the installation package to work.
Installation and Deployment After the installation of Node.js and necessary npm packages, the following code blocks are executed. The installation interface is prepared using Remix and distributed on GitHub in a built, more compact version. To make the installation interface operational and deploy it, the following steps are followed. If the assets folder does not exist in the * public* directory, it is created, and the compiled client files are copied to this directory after compilation. Then, if there is a previously created instance of piri.subchains.installer on pm2, it is removed, and the application is started on port 7473 ( internal) according to the vite.config.js settings. Once the application is up and running, it is configured to be published externally using nginx. For this, the necessary nginx checks are performed, and the necessary services are installed (if not already installed). After installing nginx, the relevant settings for the application to be published are saved in the * /etc/nginx/sites-available/* and /etc/nginx/sites-enabled/ directories. The application is prepared to be published externally on port 7474.
To access your installation application via port 7474 on the server's IP address, you need to activate the 7474 port as an inbound rule in your server's firewall settings or through your firewall interface. For a more secure installation, it is recommended to restrict access to this port only to your IP address and your IPs. You can do this using the ufw commands on Ubuntu:
ufw allow from <your IP Address> to any port 7474
A.4. Installing Node:
Once you have completed the installation, you will access the following interface on your server's IP address at port 7474.
http://[ipaddress]:7474
Click the Start to Build Your Sub-Chain button to proceed to the next screen.
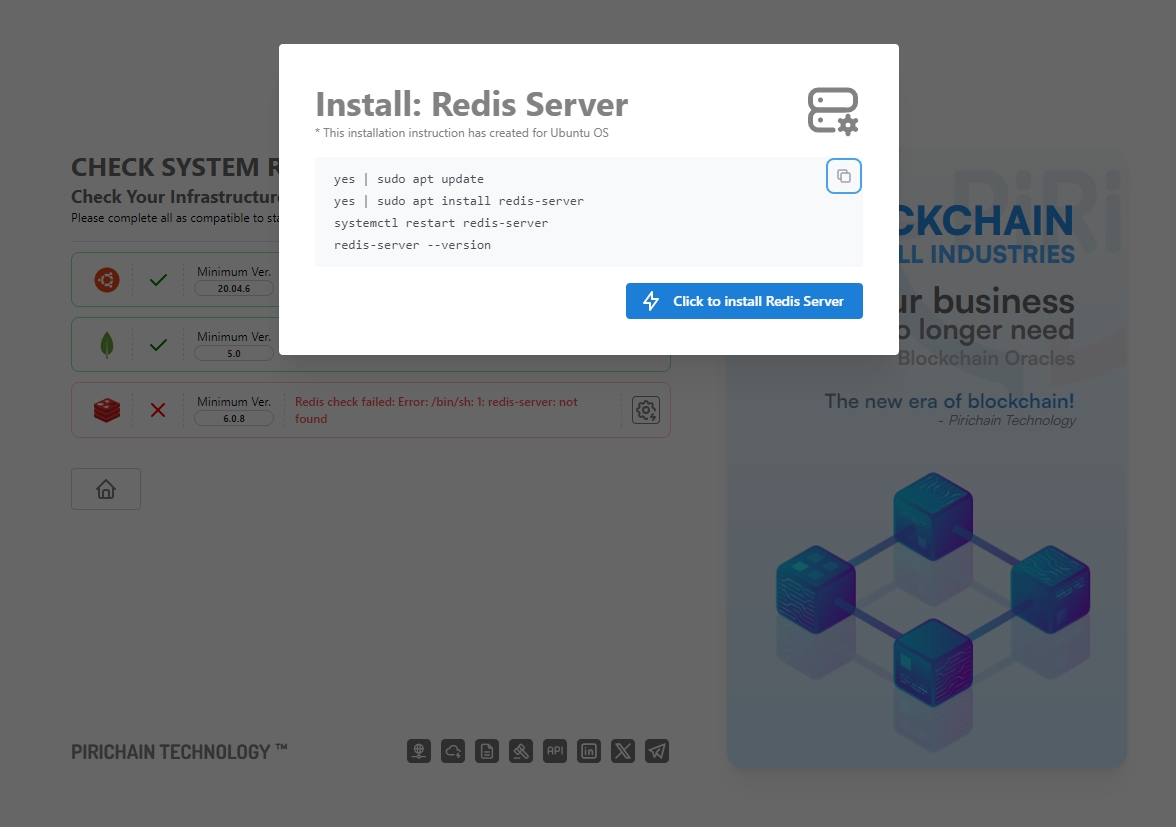
The node server for the installation package checks for the presence of the following two services on your system:
MongoDB (minimum version: 5.0)
Redis Server (minimum version 6.0.8)
If these services, or a version higher than the minimum, are not installed on your system, they can be automatically installed for you. If these services are already installed on your system, you can proceed directly to the next step. If they are not installed yet, you can open the modal window containing the installation codes by clicking on the installation button on the right side of each line, and you can also install them within this window using the Click to Install ... buttons, without the need to switch to the server's code window.
If you prefer, you can manually run the codes found in these windows on the server console, and after completing the installation, you can refresh the page to see the results. When your necessary service installations are completed, you will encounter screens like the following.
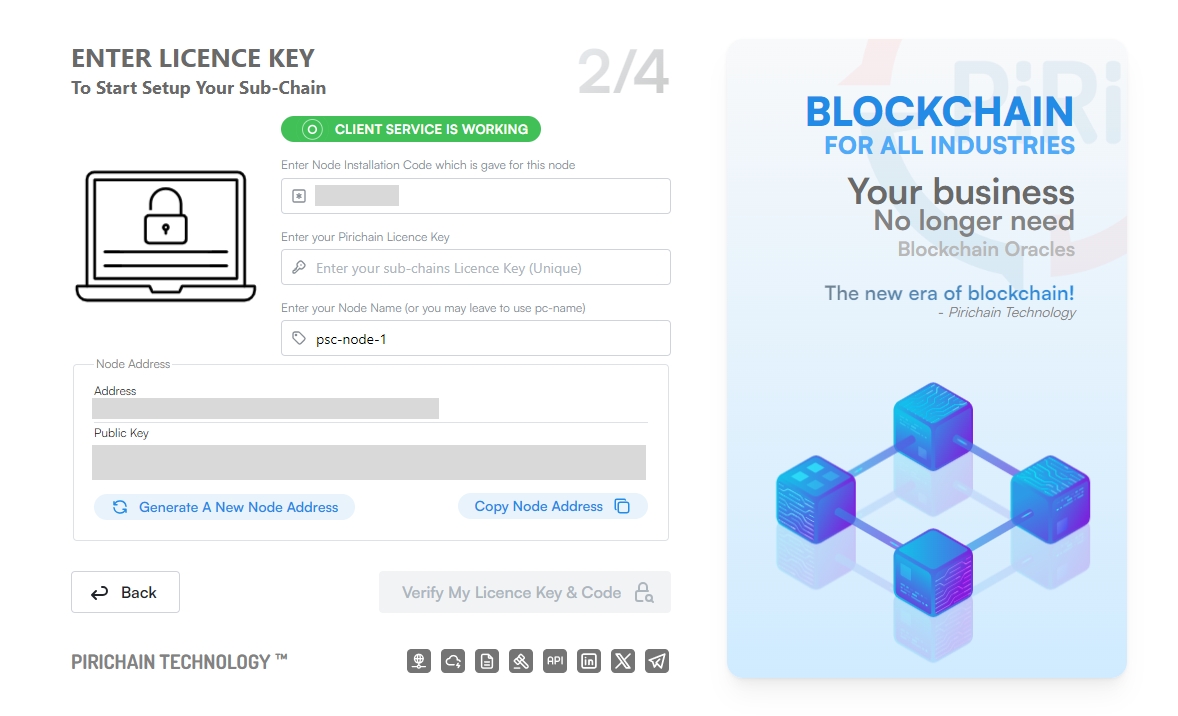
You can proceed to the next step by clicking the Next Step to Proceed button. In the next step, you will need two parameters:
Installation Code
License Key
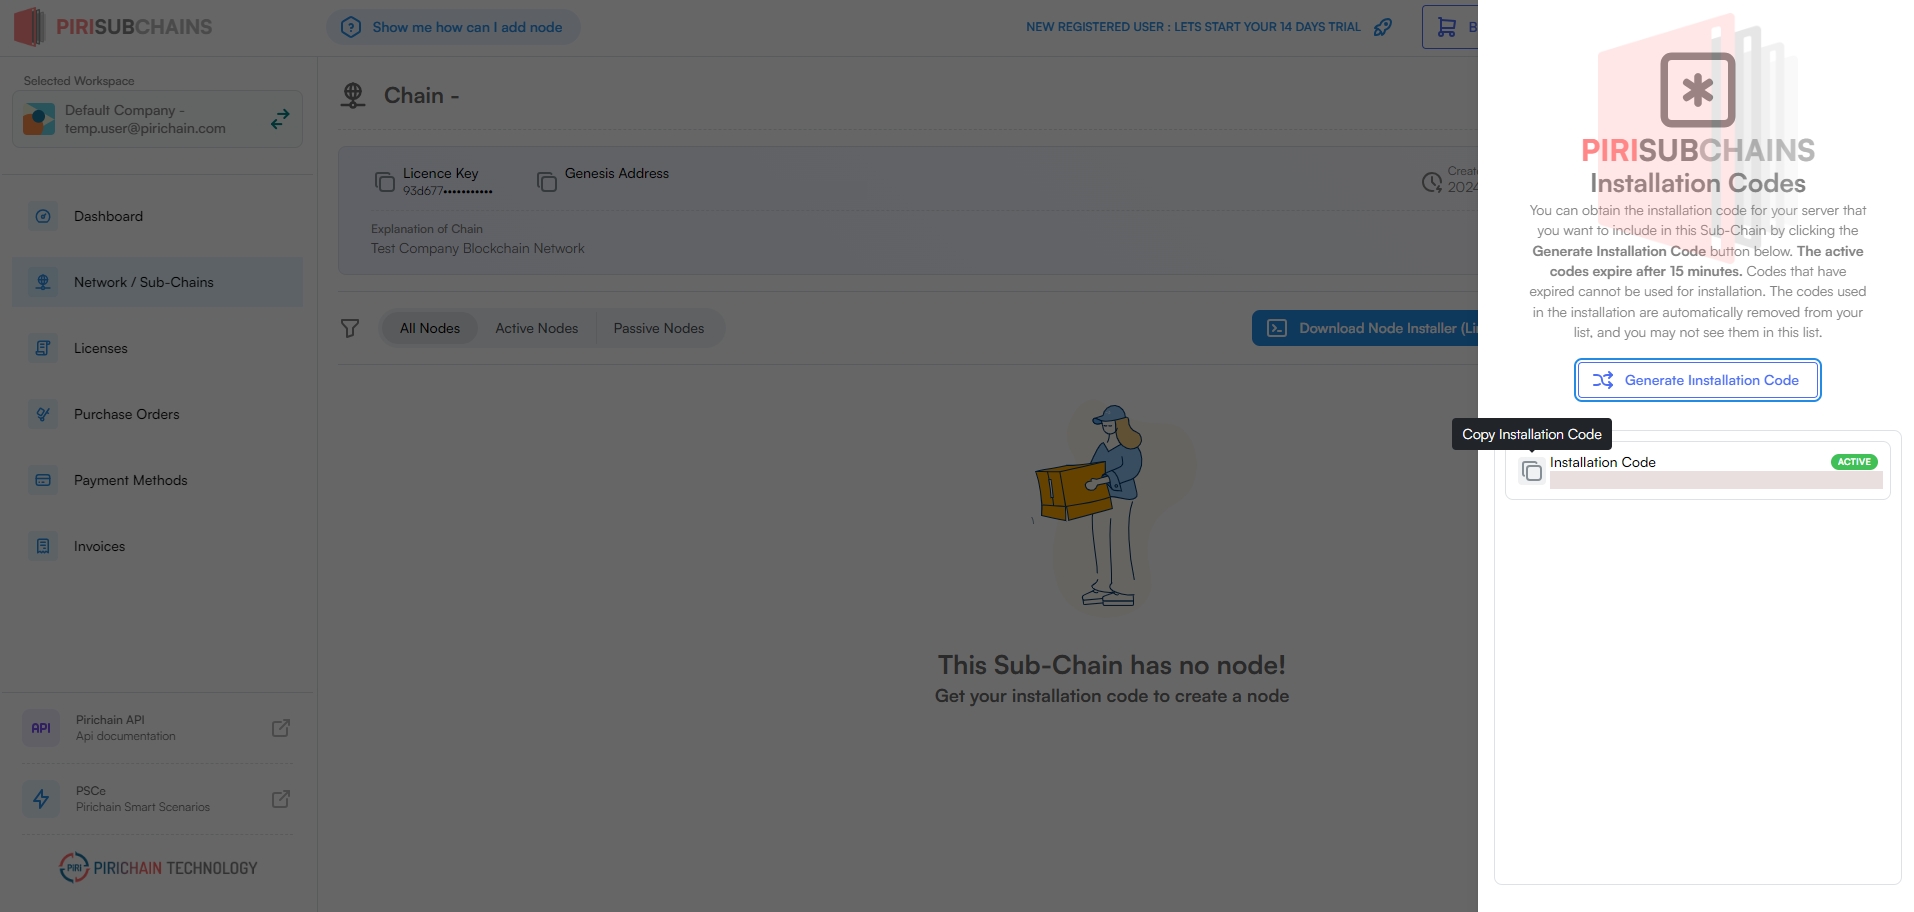
When you click on the Installation Codes to Add Nodes button on this page, a section like the following will open up.
In the opened window, you can view the installation codes or generate new ones. An installation code is valid for 15 minutes and can only be used once. Codes are automatically deleted from the system after use or if their validity period expires. Expired codes are also periodically deleted by the system.
Clicking the Generate Installation Code button will create a new installation code for you. The generated code will be displayed in the list below. You can copy this code by clicking on the copy icon next to it. Then, paste this code into the Installation Code box on your installation screen (shown below).
Another required piece of information is the License Key, as mentioned above. For this information, you can return to the license portal interface and copy the License Key from the title section of your subchain (shown below).
Paste the copied information back into the installation screen in the License Key section. The information generated in the Node Address field is specific to your node and is created by your installation package. This information is the PIRI address of the node. Each node has a PIRI address, and it can use this address to sign transactions on the blockchain. This address does not contain any assets and is used for addressing purposes only. While it is important to store this information securely, it is not mandatory because this information can be changed in some scenarios (as will be explained in different usage scenarios in the future) by network administrators and representatives.
You can change the Node Name during installation. Normally, this is the name of the device where the installation is taking place. However, you can manually change it to any name you prefer, ensuring it consists of Latin characters. Enter your desired name in the box requesting the Node Name, as shown in the screen below.
Now, click on the Verify My Licence Key & Code button to register your node with the license server. When this process is successful, you will be directed to the next screen.
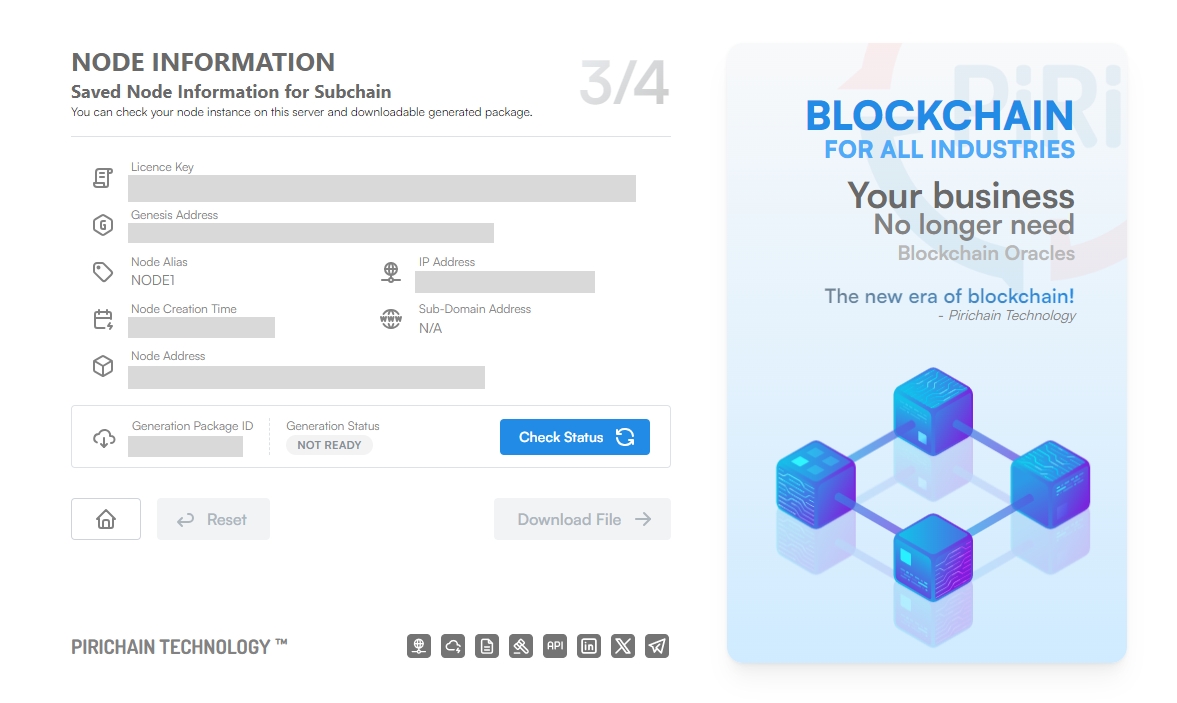
If your verification is successful, on the next screen, you will see the node information you registered with the license server (as shown in the image below). At this point, the license server will prepare an installation package for this node. You can check the status of this package by looking at the notification to the right of the Generation Package ID label at the bottom of the section. Additionally, you can update the installation status of your package by clicking the Check Status button.
When your installation package is ready, you will see the screen below. Click the Download File button to proceed to the next and final step of the installation interface.
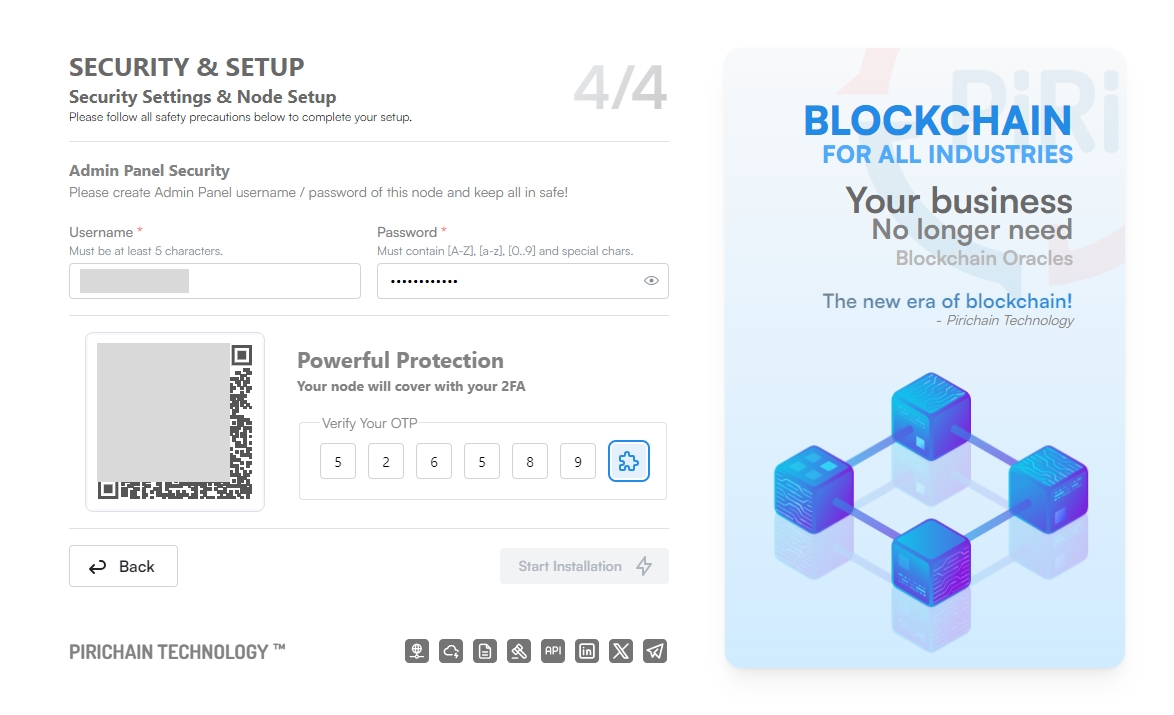
In this final step of the installation package, you will be prompted to perform three different tasks:
Creating a user for the node admin interface
Generating a QR code for the OTP code
Verifying the OTP installation
You will use the user information you create to log in to the node admin interface. It is advisable to store this information in a secure location where no one else can access it. Additionally, it is mandatory to choose a password that meets high security requirements.
After entering your user and password information, click on the Generate 2FA Code button at the bottom. This will generate a QR code in the section labeled "2FA QR CODE" on the screen.
Read the QR code generated by clicking the Generate 2FA Code button using an authenticator app on your mobile, PC, or tablet to generate a 6-digit OTP code. To complete the installation of the authenticator, enter the code generated in your authenticator device into the PIN Code section of the Verify Your OTP section, and click on the puzzle icon to verify the code before it expires (it will be generated in 30-second intervals).
After verifying your OTP setup, the Start Installation button will become active. Click this button to start the node installation process.
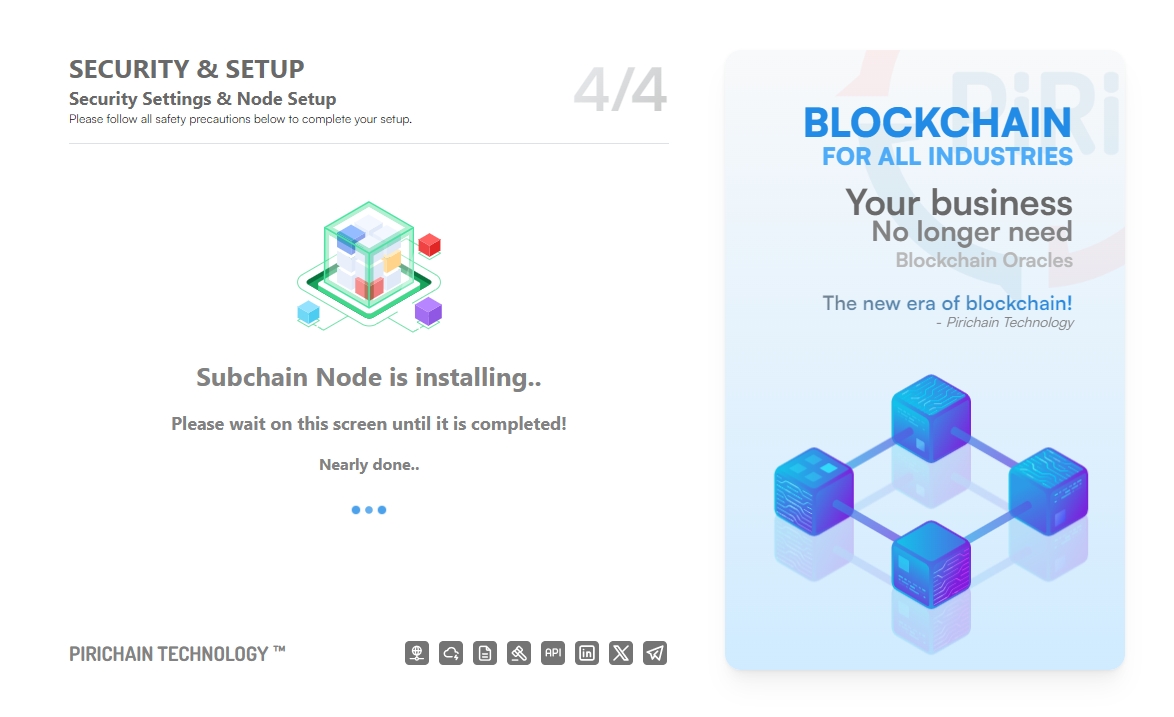
Node installation completes, the installation package will automatically redirect you to the node management interface at your server's IP address on port 1459.
You now have your own blockchain and its first node. When you have a sub-chain and a node, what does this mean? It means that the sub-chain you've set up with Pirisubchain infrastructure is not included or associated with any network. It's a system you own, with your own network, where you can set up your own nodes, establish your own ecosystem, set your own rules, and develop your own applications without paying any commission fees.
Most known blockchain systems require you to be connected to a main network. Some blockchain systems that offer sub-chain services (which are mostly derivatives) require advanced technical knowledge and many restrictive rules. Moreover, integration into every sector is either impossible or extremely costly. The biggest cost factor here is DATA.
Now, you can start setting up your other nodes using the same methods.
A.5. Node Manager Screen and Sync With Other Nodes
A.5.1. Sync Nodes and Restart
First, open this interface for all your nodes in different tabs or windows. You'll need to log in to each one separately. Click the Login For Management button in the top right corner of the screen you see below to proceed to the Login screen.
In this screen, enter the username, password, OTP code, and Captcha code displayed on the screen for each node you've set up to log in. Once you've logged into all screens, go to the management screen of the MOST RECENTLY INSTALLED NODE. Because the most recently installed node is the only node that has received all the information for all other nodes.
You will see the screen below. While there are many sections you can use on this screen, the part we will focus on now is the node information on the main screen. We will synchronize each of the other nodes installed to be included in this sub-chain. To do this, click on the Edit JSON button next to the Node Properties section in the Configurations tab on the screen below.
Please expand the small window that opens by grabbing it from the bottom right corner so you can read its contents comfortably. Copy all the information in the MAINNET_NODES property, which is circled in red in the image below (no need for square brackets "[" and "]"). Paste this copied information into all other nodes to make sure they are the same, then click the Save button at the bottom of the small window. After that, on the management screens of all nodes, click the large SAVE button in the bottom right corner of the screen to save all the information.
To ensure that the changes we made are revised by all nodes, click the Restart Node button at the top of each node's screen (under the PIRI Logo) to restart all nodes.
Congratulations, you now have a fully functional sub-chain blockchain. You can now test your network with http://ipaddress:1459/[...endpoints]. The basic asset name for your blockchain is PIRI. The Genesis Address you used to create your network has an unlimited supply of PIRI tokens.
You can test your network using POST and GET requests with the complete list of endpoints available from the Node IP interface.
A.5.2. Namespace, DNS Settings and Scanner View
Your network's nodes all have a mechanism that can receive requests from external sources and can also forward them to other nodes until you coordinate it to be a single entry point.
What this means is: Let's say you have 10 nodes in your network. And each of these nodes can receive and process requests for endpoints (POST - GET) with http://ipaddress:1459. This situation, as needed dynamically (which can vary according to the dynamic structure of the business logic, which is quite normal because we announced this structure as dynamic consensus), may sometimes require only one entry point to send queries to the network and communicate with the network. In this case, you may need to make some restrictions in your network structure in terms of network.
Let's continue with an example. Suppose you want to open one of these 10 nodes to the outside and position the others as nodes that only communicate internally and approve transactions. In this case, log in to the management interface of the node you want to expose to the outside and find the IP_ADDRESS and PORT entries located just below the TESTNET_NODES section on the main page.
Next to this IP address, write :80 or the port you want to open to the outside.
The reason for specifically defining it as
80here is that port80is more useful when broadcasting to a domain (or subdomain).
Please change the PORT information below to either 80 or the port number you prefer. Then, on all your node screens, set the * server* role for this node to true as shown in the image below and click the SAVE button to save. Then, to distribute the change to the entire network, restart all nodes by clicking the Restart Node button.
Before proceeding to the next step, ensure that you have closed the 1459 ports of all your other nodes using your network administrator (console or interface) for your server. Otherwise, endpoints can be accessed using the IP address of your nodes (restricted or public) via the 1459 port. In this scenario, since we want to open only one node to the outside, the 1459 ports of the other nodes should be closed to the outside.
After completing these steps, access the interface of the node whose PORT setting you changed with the new ipaddress:newportnumber. If you have completed these changes, let's define this IP address in DNS to broadcast it as https (assuming port 80).
DNS Settings (Illustrated with Cloudflare) In the example below, the IP address to be opened to the outside is designated as a subdomain in the Pirichain system, but you can define it with your own domain or subdomain as well.
Since we have enabled HTTPS settings through Cloudflare, we know that we can access this address as https://tempcompany.pirichain.com. However, you can configure your HTTPS settings to be dependent on your own servers or different service provider settings. Here, only an example DNS setting is discussed.
You may already have a wallet at this stage, and if so, you can skip this screen and proceed to the next screen.
Click the Import Wallet button in the top right corner of this screen to import your existing PIRI address, or click the **Create Wallet ** button to create a new PIRI address.
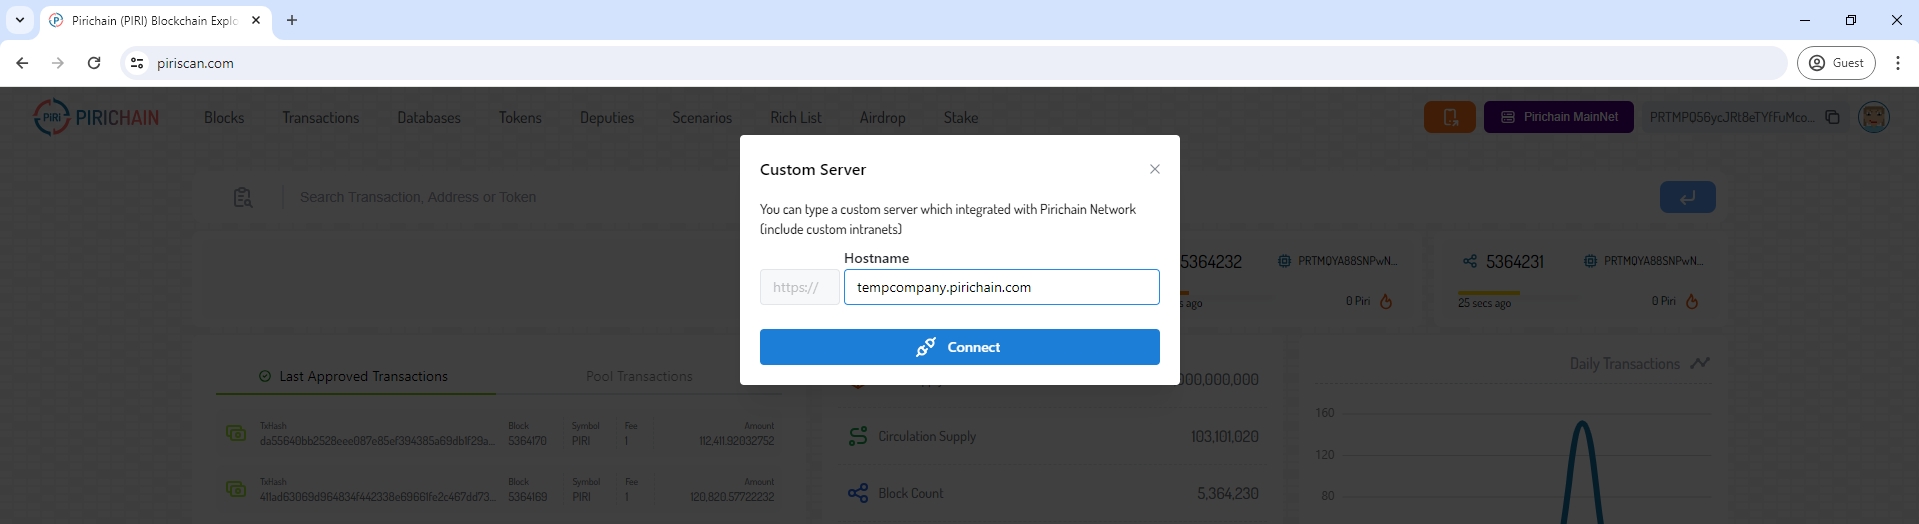
When you create or import a PIRI address, the header of the page will change as follows. Click on the button that says Pirichain Mainnet and select Custom Server from the dropdown menu.
In the opened window, enter your created hostname in the box labeled Hostname, without the https:// prefix. In our example, this is written as tempcompany.pirichain.com. Then click the connect button.
You can now access blocks and all other features of the blockchain you just created through this interface, as shown below. The hostname information you entered in this interface is stored in your browser's local storage. It will continue to be retained unless you clear your browser cache. You can also access any network created with the Pirisubchain infrastructure through this interface by entering the hostname.
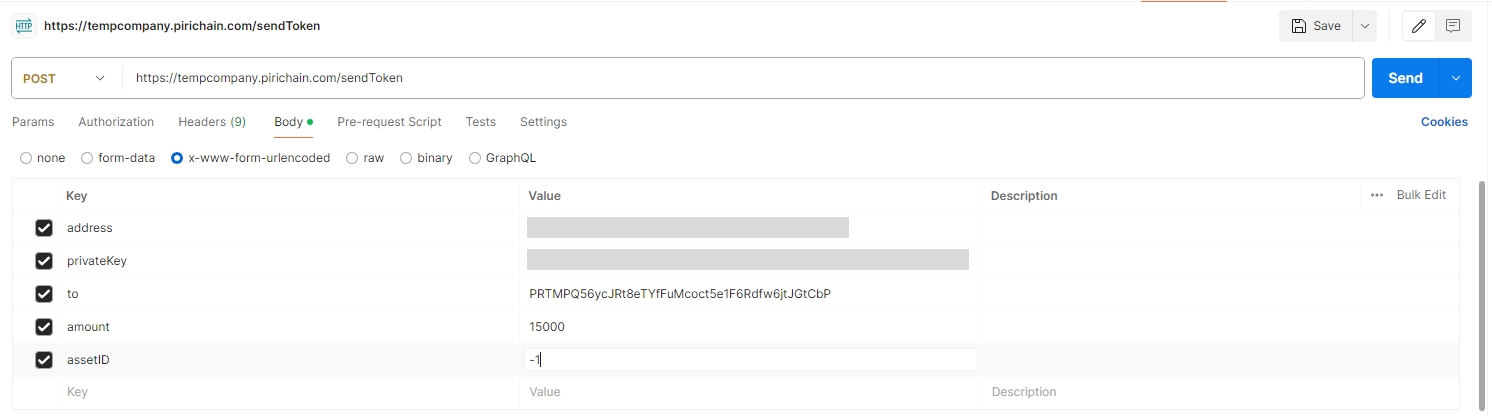
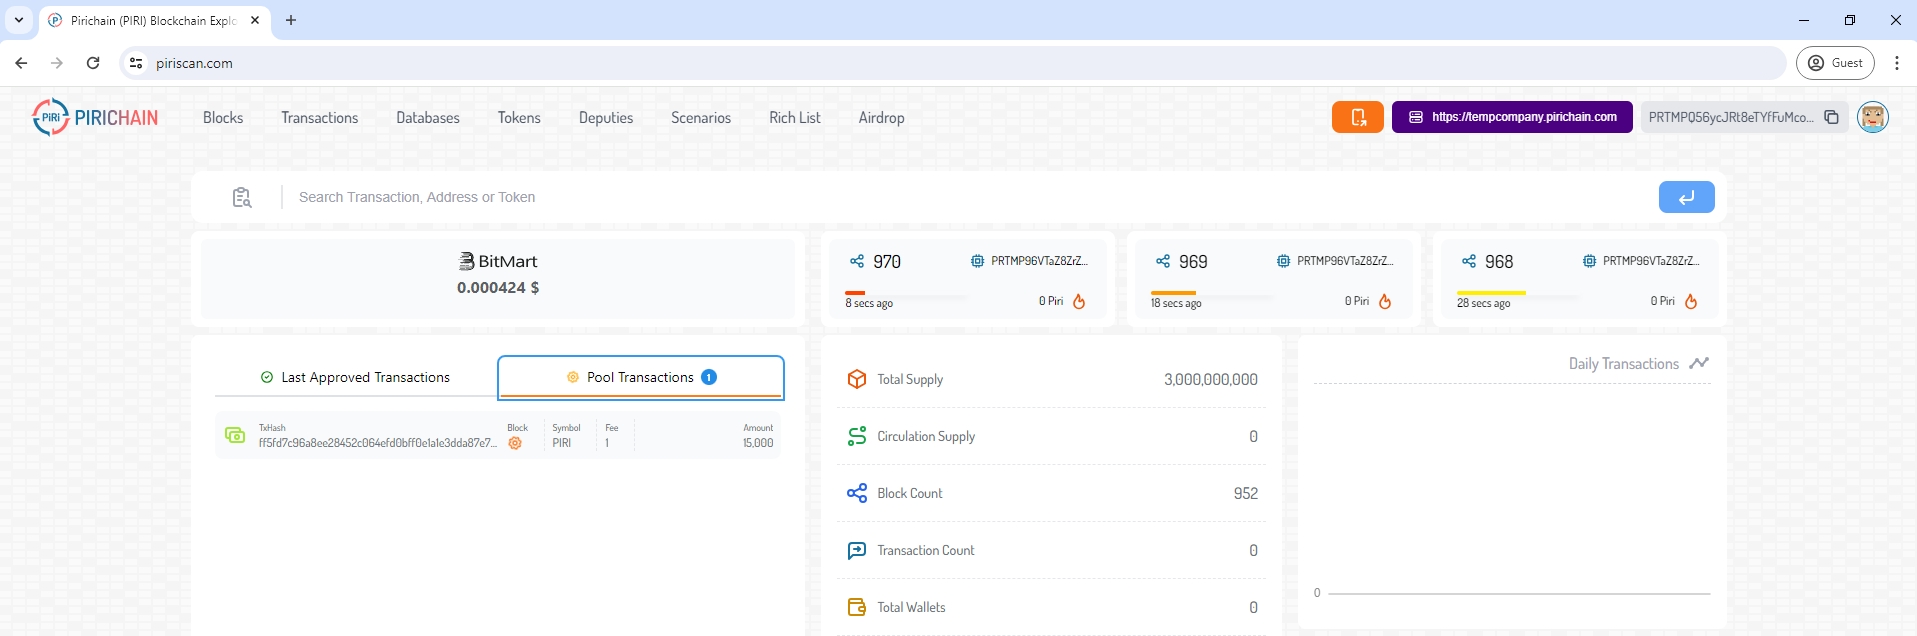
And finally, let's make a sendToken transaction to the address shown on the screen using the Genesis Address. The Piriscan interface does not have the ability to use unlimited assets for the Genesis Address. Therefore, we will create a POST request using Postman or a different tool.
Let's create a POST request as shown below (you can use a tool other than Postman) to https://ipaddress/sendToken. Enter the Genesis Address in the address field, the Private Key belonging to the Genesis Address in the privateKey field, enter the PIRI address you created in the Piriscan interface in the to field, enter any number you want in the amount field (e.g., 9999999 or 1 or 0.0002). Finally, enter -1 in the assetID field and click the Send button in the top right corner. Now go back to the Piriscan interface and watch the transaction formation.
As you can see in the screen below, the transaction you created is immediately included in the Pool Transactions. And within 30 seconds, it will be included in the Last Approved Transactions. In systems created with the Pirisubchain infrastructure, the block creation time is 10 seconds. The approximate approval time for a transaction is about 30 seconds.
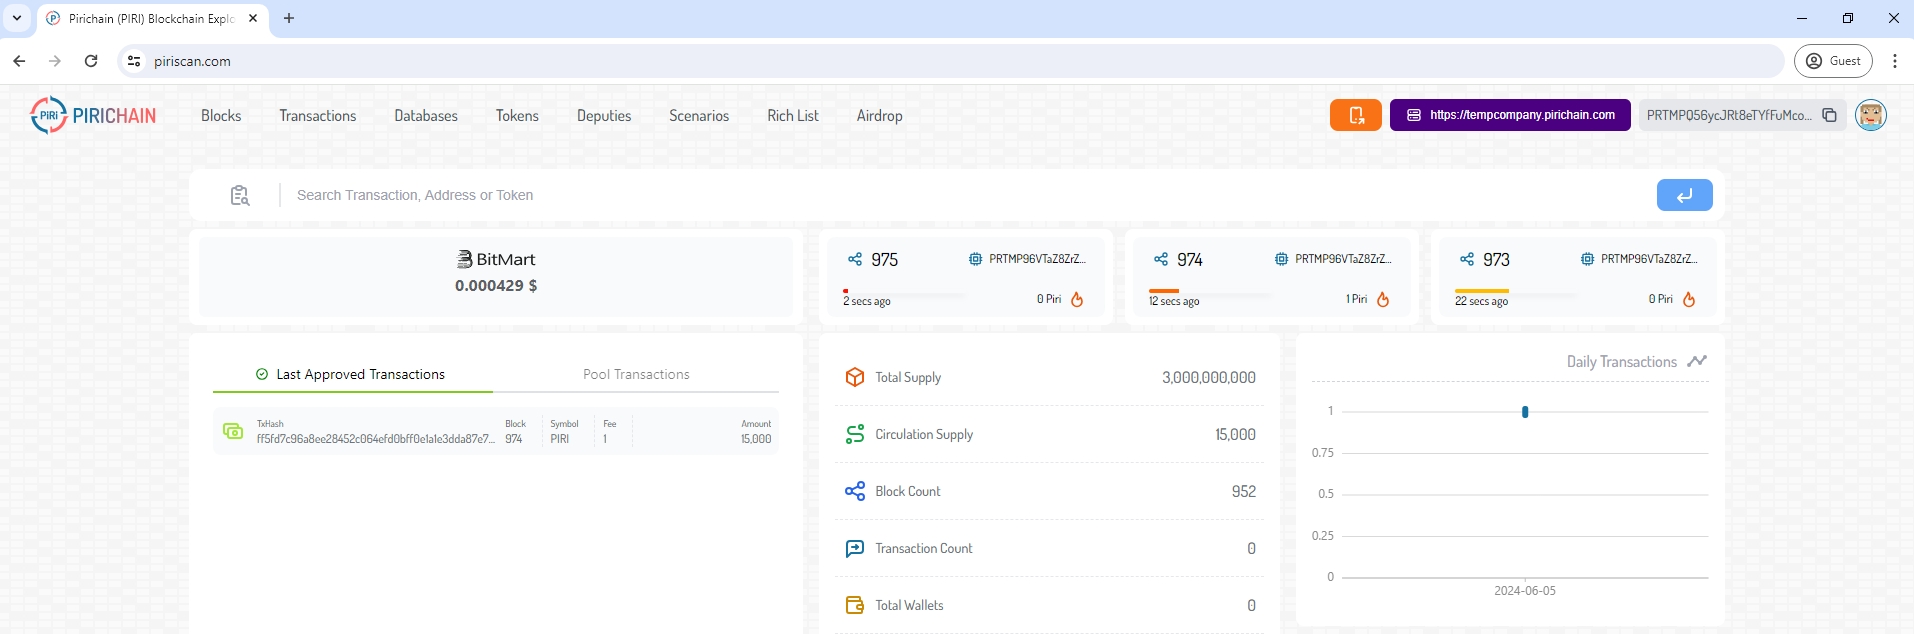
As you can see, the transaction has been approved and entered into the Last Approved Transactions.
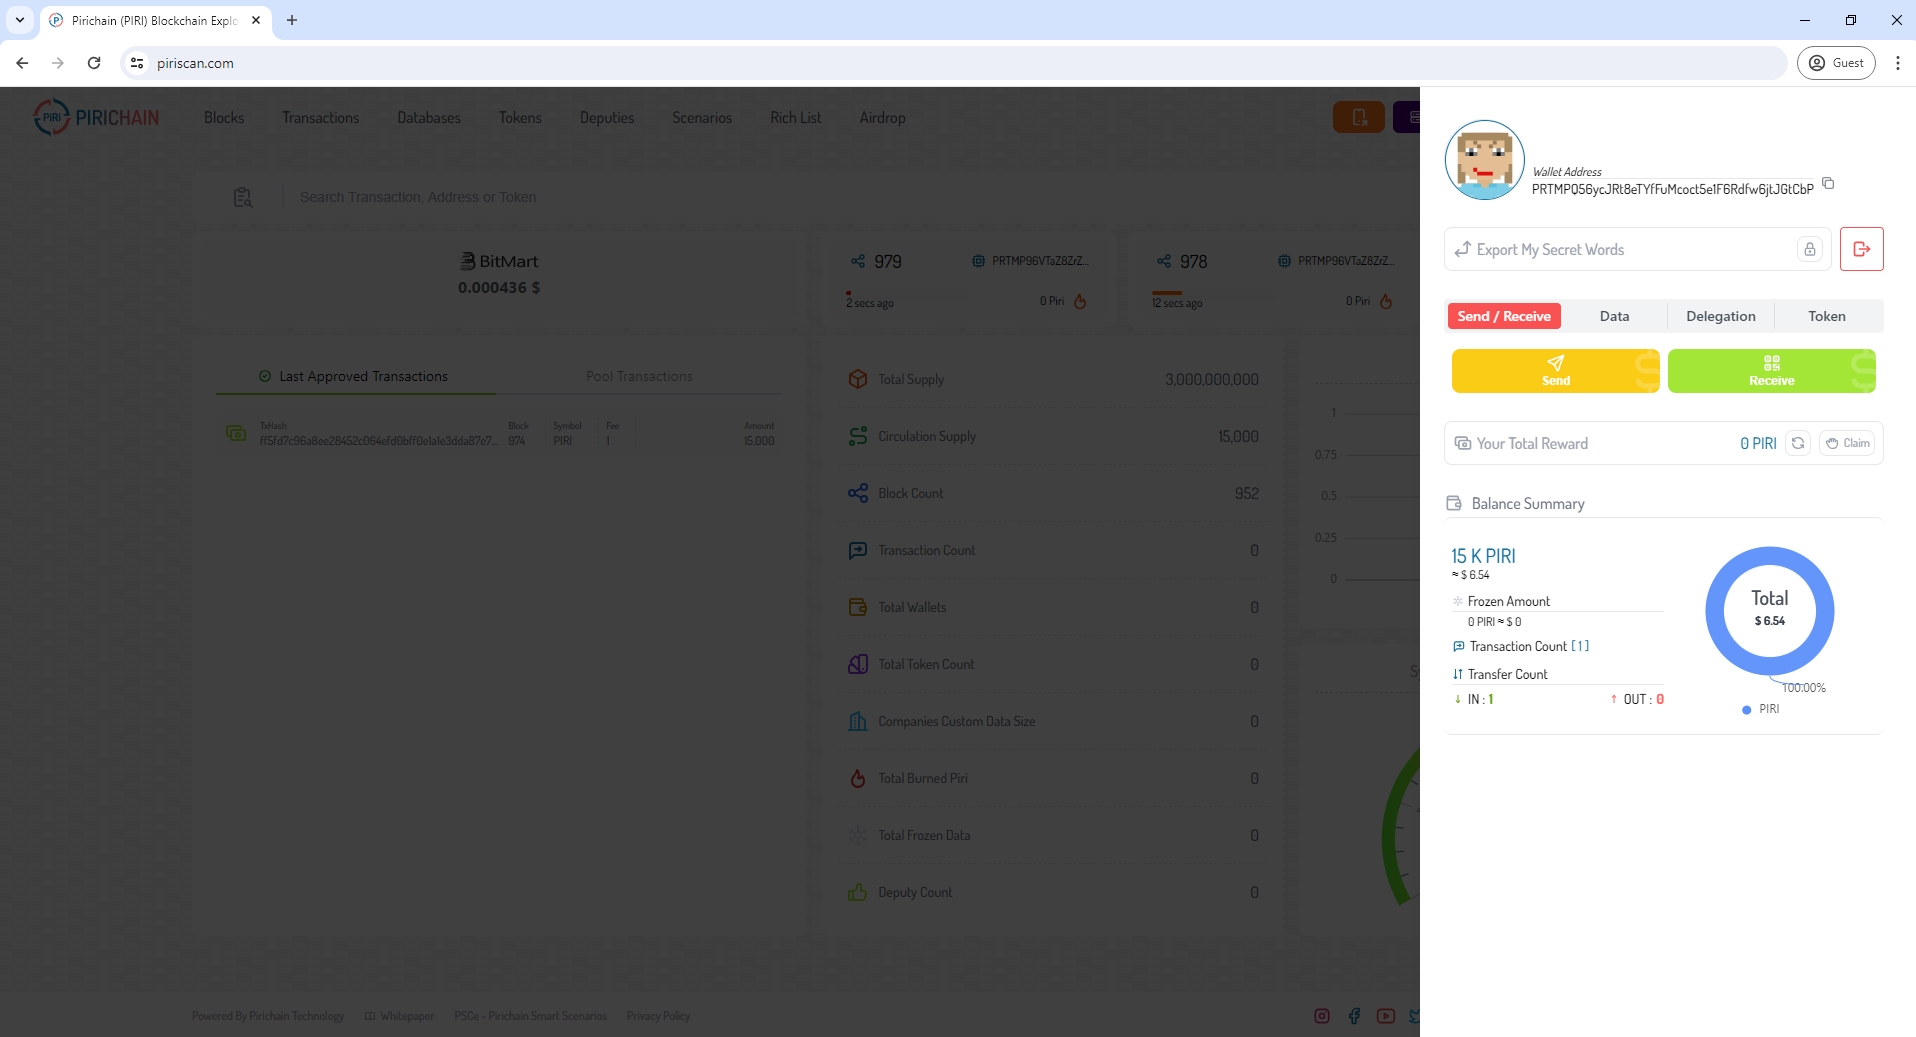
Finally, let's check the balance for this address: The 15,000 PIRI we sent has been received at this address.
Congratulations! 🎉 🥳
You now have your own blockchain where you can create your own ecosystem with unique features. It's especially suitable for data-driven, real-time applications, and it can be used in industries of all sizes.
We're very inspired by what you can build.
At Pirichain Technology, we continue to innovate in blockchain technologies...
For all your questions and issues about the installation and use of the Pirisubchain Node Installer, you can use the section or email .
You can easily register by going to with your email address and a password of your choice. You can also add optional company information as shown on the screen. Filling in additional information is not mandatory, but to generate invoices for your licenses, you will need to complete this information later. For individual use, company details are not required at any time.
Check the content of the registration email. If the email does not appear as shown below and the sender's SPF and DKIM records are not valid, please do not click on the links and report it to us at .
To obtain these, when you visit the relevant subchain detail page on (as shown in the screenshot below), you will be able to obtain them.
Pirichain Technology, data-oriented and can be used in all industries, easily integrated with all kinds of technologies ( see ) (IoT, IoMT, AI, SaaS, Socket, Web-Services, etc.) without the need for any blockchain oracles (because it serves a compact oracle function itself) using the Pirisubchains infrastructure.
In this section, you'll find information on how to get your network up and running and how to track it on the scanner interface () after setting up your other nodes.
Now, let's move on to viewing your network on .
Now let's go to .